7.
Administration Module
The Administration Module lets users manage the organisations, classes,
students and subjects records.
7.1 Organisation Administration
7.1.1 Creating New
Organisations
a. In the SMART Menu, select “Admin” and
“Organisation…”, Figure 7.1 is displayed
b. Click on the “New …” button and Figure 7.2 is
displayed
c. Enter new organisation details: name, cluster
and zone if applicable
d. Click on the “OK” button
e. In Figure 7.1, check on the “Default” box to set
as the default organisation if applicable
f. Click on the “Exit” button
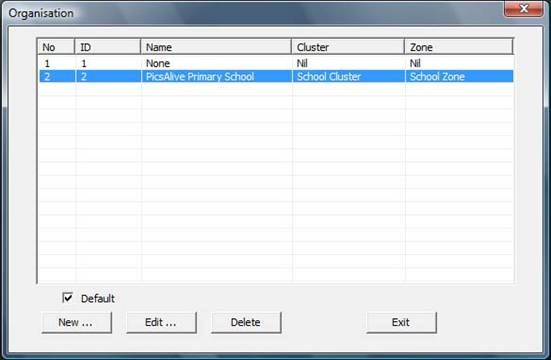
Figure 7.1: Organisation
Administration Module
7.1.2 Editing
Organisations
a. In the SMART Menu, select “Admin” and
“Organisation…”, Figure 7.1 is displayed
b. Select the Organisation to be edited from the
list in Figure 7.1
c. Click on the “Edit …” button and Figure 7.2 is
displayed
d. Edit organisation details: name, cluster and
zone
e. Click on the “OK” button
f. In Figure 7.1, check on the “Default” box to set
as the default organisation if applicable
g. Click on the “Exit” button
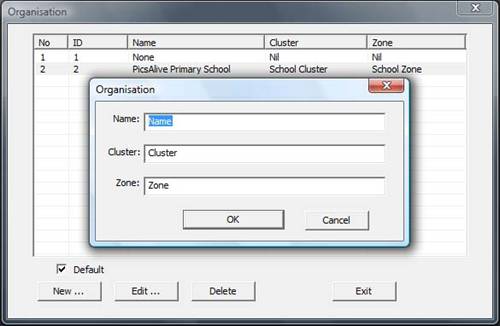
Figure 7.2: Create or Editing
Organisation Records
7.1.3 Deleting
Organisations
a. In the SMART Menu, select “Admin” and
“Organisation…”, Figure 7.1 is displayed
b. Select the Organisation to be removed from the
list in Figure 7.1
c. Click on the “Delete”
d. Click on the “Exit” button
7.2 Class and Student
Administration
7.2.1 Creating New
Classes and Students
a. In the SMART Menu, select “Admin” and “Class…”,
Figure 7.3 is displayed
b. Click on the “New …” button and Figure 7.4 is
displayed. Enter Class Name and Description
c. To create a new Student Record, click on the
“New Student …” button. Figure 7.5 is displayed.
Enter
Student details and click on the “OK” button
d. To edit Student records, select the Student in
Figure 7.4 and click on the “Edit Student …” button.
Figure
7.5 is displayed. Enter Student details and click on the “OK” button
e. To remove Student records, select the Student in
Figure 7.4 and click on the “Delete Student”
button
f. To
reorder Students’ records, click on the “Up” or “Down” buttons to move the
student up or
down
respectively
g. Click on the “Save and Exit” button to update
the changes
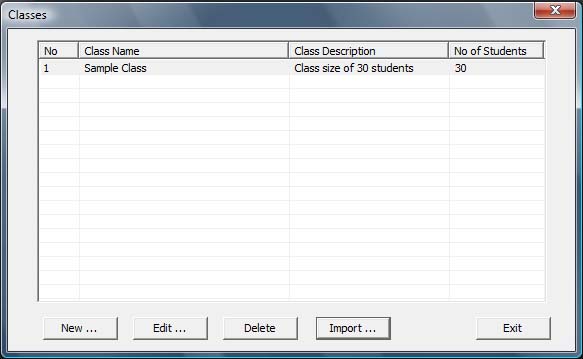
Figure 7.3: Class Administration
Module
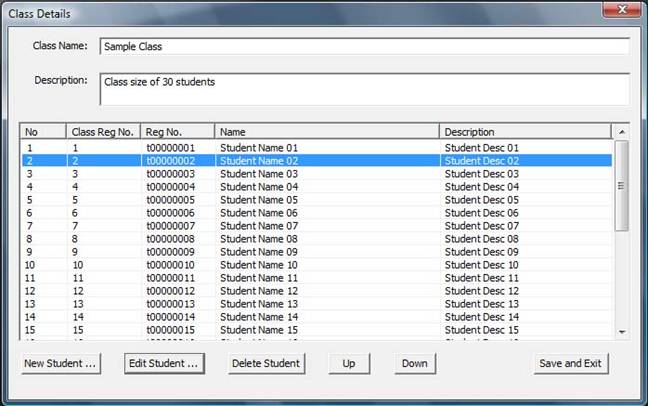
Figure 7.4: Student Administration
7.2.2 Editing Classes
and Students
a. In the SMART Menu, select “Admin” and “Class…”,
Figure 7.3 is displayed
b. Click on the “Edit …” button and Figure 7.4 is
displayed. Edit Class Name and Description
c. To create a new Student Record, click on the
“New Student …” button. Figure 7.5 is displayed.
Enter
Student details and click on the “OK” button
d. To edit Student records, select the Student in
Figure 7.4 and click on the “Edit Student …” button.
Figure
7.5 is displayed. Enter Student details and click on the “OK” button
e. To remove Student records, select the Student in
Figure 7.4 and click on the “Delete Student”
button
f. To
reorder Students’ records, click on the “Up” or “Down” buttons to move the
student up or
down
respectively
g. Click on the “Save and Exit” button to update
the changes
7.2.3 Deleting Classes
and Students
a. In the SMART Menu, select “Admin” and “Class…”,
Figure 7.3 is displayed
b. Click on the “Delete” button. Note: the Class and all Students in the class
will be removed
c. Click on the “Exit” button
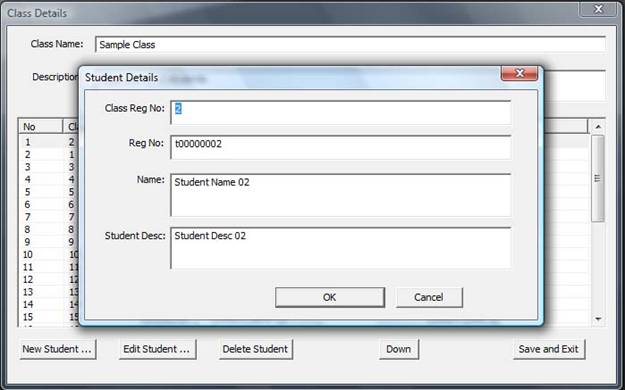
Figure 7.5: Creating or Editing
Student Record
7.2.4 Mass Import
of Classes and Students
a. In the SMART Menu, select “Admin” and “Class…”,
Figure 7.3 is displayed
b. Click on the “Import …” button and Figure 7.6 is
displayed
c. To get sample of the Excel file import format,
click on the “Get Sample Excel …” button.
A dialog
box to
select directory to save the file “students.xls” appears. Select the directory
and click on the
“Save”
button. A sample of the import Excel file format is shown in Figure 7.7
d. To import Excel file for mass import, click to
“Browse” button to select file. The
Students are immediately imported and listed.
e. Enter Class Name and Description
f. Click on the “Import Class” button. Note: A new
class will be created
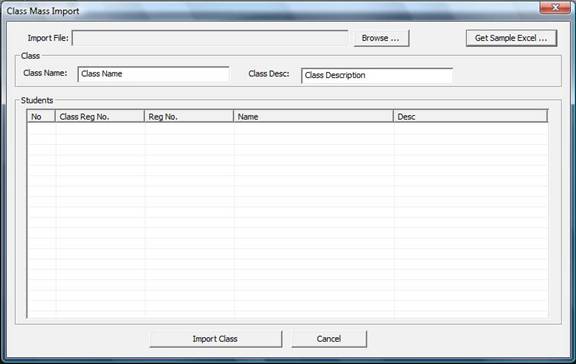
Figure 7.6: Mass Student Import
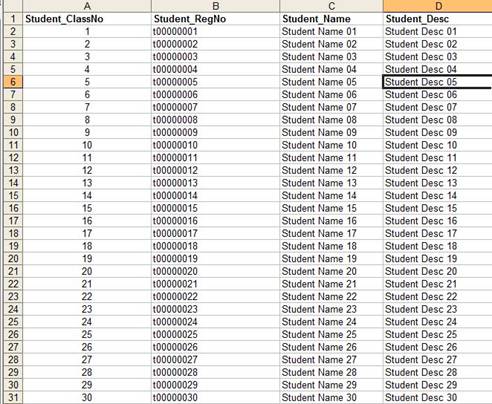
Figure 7.7: Excel Mass Student
Import File Format
7.3 Subject Administration
7.3.1 Creating New
Subjects
a. In the SMART Menu, select “Admin” and
“Subject…”, Figure 7.8 is displayed
b. Click on the “New …” button and Figure 7.9 is
displayed
c. Enter new Subject Name and Description
d. Click on the “OK” button
e. Click on the “Exit” button in Figure 7.8
7.3.2 Editing Subjects
a. In the SMART Menu, select “Admin” and
“Subject…”, Figure 7.8 is displayed
b. Select the Subject to be edited
c. Click on the “Edit …” button and Figure 7.9 is
displayed
d. Edit Subject Name and Description
e. Click on the “OK” button
f. Click on the “Exit” button in Figure 7.8
7.3.2 Deleting Subjects
a. In the SMART Menu, select “Admin” and
“Subject…”, Figure 7.8 is displayed
b. Select the Subject to be removed
b. Click on the “Delete” button
d. Click on the “Exit” button in Figure 7.8
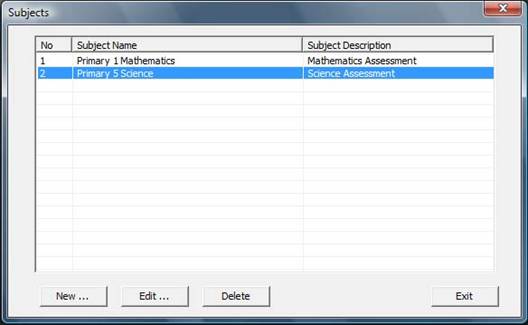
Figure 7.8: Subject Administration
Module
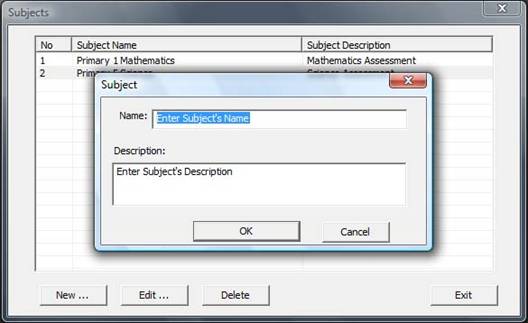
Figure 7.9: Creating or Edit Subjects