4.
Quiz Bank
The Quiz Bank imports questions from the Item Bank and exports the
question as an Adobe PDF file for printing.
Figure 4.1 shows the main module of the Quiz Bank. In Figure 4.1, the left hand side of Figure
4.1 displays the quiz folders or directories and the right-hand side shows the
quizzes and the number of questions in each quiz.
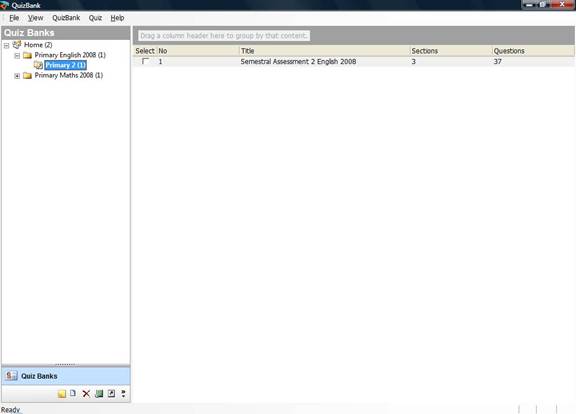
Figure 4.1: Main Quiz Bank Module
4.1 Quiz Bank Functions
If you have any questions or experience any difficulties in SMART,
please contact us at support@picsalive.com
and we will respond promptly
4.1.1 Creating New Quiz
Banks
a. Select the Parent Quiz Bank (on the left) to
insert the new bank
b. In the Quiz Bank Menu at the top, select “New
…”. Alternatively, click on the New Bank icon ![]()
c. Enter the name and description of the new Quiz
Bank in the dialog box (Figure 4.2)
d. Click on the “Create New Bank” button
4.1.2 Editing Quiz
Banks
a. Select the Quiz Bank to be edited (on the left)
b. In the Quiz Bank Menu at the top, select “Edit
…”. Alternatively, click on the Edit bank icon ![]()
c. Enter the new details of the Quiz Bank in the
dialog box (Figure 4.2)
d. Click on the “Update Bank” button
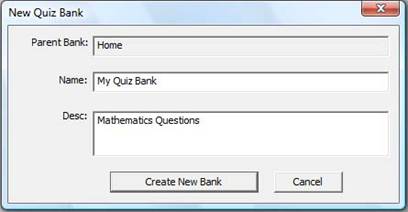
Figure 4.2: Creating a New Quiz
Bank
4.1.3 Moving Quiz Banks
a. Select the Quiz Bank to be moved with the left
mouse click. Do not release mouse
b. Move Quiz Bank to its new position and release
the left mouse click
c. The Quiz Bank and its Sub-Banks will be
automatically moved
4.1.4 Deleting Quiz
Banks
a. Select the Quiz Bank to be deleted
b. In the Quiz Bank Menu at the top, select “Delete”.
Alternatively, click on the Delete bank icon ![]()
c. A dialog confirming the deletion appears
d. Click on the “Yes” button. Note that the Quiz Bank and all its Sub-Banks
are deleted
4.1.5 Importing Quiz
Banks
a. Select the Parent Quiz Bank to
import
b. In the Quiz Bank Menu at the top, select “Import
…”. Alternatively, click on the Import bank icon
![]()
c. A dialog (Figure 4.3) appears. Click on the “Browse …” button to select the
file
d. Click on the “OK” button. Note that the Quiz Bank and all its Sub-Banks
are imported
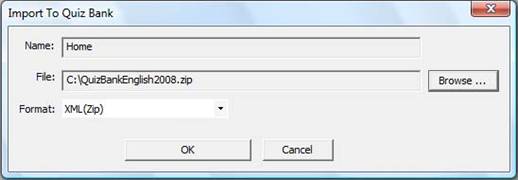
Figure 4.3: Importing a Quiz Bank
4.1.6 Exporting Quiz
Bank
a. Select the Quiz Bank to be exported
b. In the Quiz Bank Menu at the top, select “Export
…”. Alternatively, click on the Export bank icon
![]()
c. A dialog (Figure 4.4) appears. Click on the “Browse …” button to select the
output file
d. Click on the “OK” button. Note that the Quiz Bank and all its Sub-Banks
are exported

Figure 4.4: Importing a Quiz Bank
4.2 Quiz Functions
4.2.1 Create New
Quizzes
a. Select the Quiz Bank to place new quiz
b. In the Quiz Menu at the top, select “New …”
c. A dialog (Figure 4.5) appears. Enter the Quiz title and instructions (if
any)
d. Click on the “Section” tab at the top (see Figure
4.6).
e. To add a new Section, click on the “Add New
Section …” button. Enter Section’s title and
description
(see Figure 4.7). Click on the “Ok” button
f. To edit a Section, select the Section to be
edited with left mouse click. Click on
the “Edit Section …”
button
(Figure 4.7). Enter Section’s title and description. Click on the “Ok” button
g. To delete a Section, click on the “Delete
Section” button
h. Click on the “Question” Tab at the top. All the questions in the Quiz are displayed
(Figure 4.8).
4.2.1.1 Adding Questions to Quiz
i. To add a question to the Quiz, click on the “Item
Bank …” button (Figure 4.9)
j. Select the questions to be added. Click on the
“View” button to see questions. For multiple
selection,
click on the questions with the Ctrl button depress or the “Select All” button
to choose all
questions
k. Click on the “Add and Exit” button to confirm
question selection
4.2.1.2 Editing Quiz Questions
l. To edit
a question in the Quiz, select the question and click on the “Edit …” button (Figure
4.8)
m. Make the required changes to the questions in
the Question Editor (Figure 4.10)
n. Click on
the “Update and Exit” button
4.2.1.3 Deleting Quiz Questions
o. To
delete a question in the Quiz, select the question (Figure 4.8)
p. Click on
the “Delete” button
4.2.1.4 Reordering Quiz Questions
o. Select
the question (Figure 4.8)
p. Click on
“Up” or “Down” button to decrease/increase the order of the questions
respectively
q. Click on the “Create” button to create new Quiz
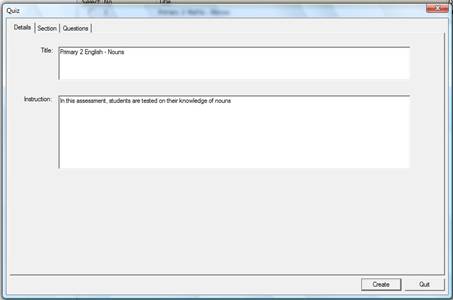
Figure 4.5: Creating a New Quiz

Figure 4.6: Quiz Section Module
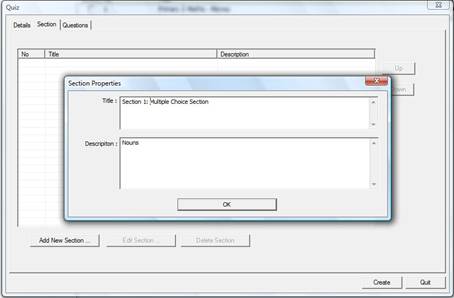
Figure 4.7: Quiz Section
Parameters
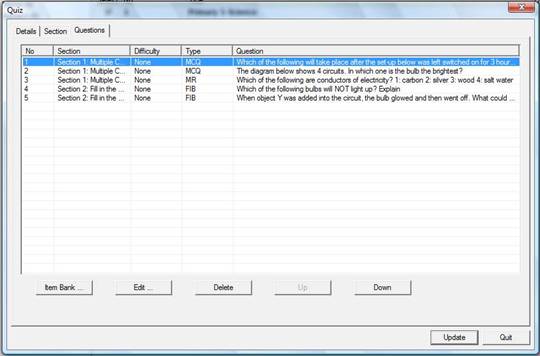
Figure 4.8: Quiz Questions Module
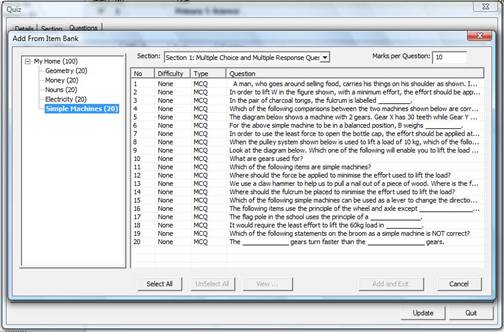
Figure 4.9: Add Questions to Quiz
From Item Banks
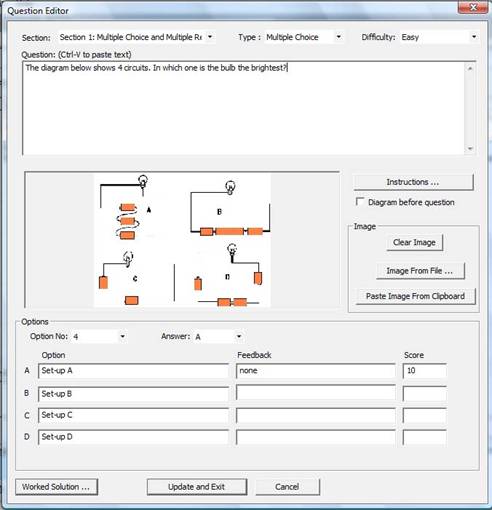
Figure 4.10: Editing Quiz
Questions
4.2.2 Editing Quizzes
a. Select the Quiz Bank and choose the Quiz to be
edited (Figure 4.1) by clicking on the Select column
beside
the Quiz
b. In the Quiz Menu at the top, select “Edit …”
c. The “Question” Tab is displayed (Figure 4.8).
Click on the “Item Bank …” button to add questions,
“Edit …” button to edit the questions,
“Delete” button to remove questions and “Up/Down” button
to reorder the questions in the Quiz
d. Click on the “Section” Tab to edit the Quiz
Sections (Figure 4.6). Click on the “Add Section …”
button to insert Sections, “Edit Section
…” button to amend Section parameters and “Delete
Section” to remove the Section in the
Quiz
e. Click on the “Details” Tab to edit Quiz title
and instructions (Figure 4.5)
f. Click on
the “Update” button to save changes
4.2.3 Duplicating
Quizzes
a. Select the Quiz Bank and choose the Quiz to be
duplicated (Figure 4.1) by clicking on the Select
column
beside the Quiz
b. In the Quiz Menu at the top, select “Duplicate”
4.2.4 Deleting Quizzes
a. Select
the Quiz Bank and choose the Quiz to be deleted (Figure 4.1) by clicking on the
Select
column
beside the Quiz
b. In the Quiz Menu at the top, select “Delete”
c. A dialog confirming the deletion is displayed
d. Click the “Yes” button
4.3 Printing Quizzes
Quizzes can be printed to an Adobe PDF files in three formats: “Question
with Barcodes”, “Answer Form” and “Questions without Barcodes”. In the
“Question with Barcodes” format, barcodes for question identification, student
registration number, marks, answer, page number and assessment identifications
are automatically inserted into the paper (see Appendix A). Note that the barcodes for question answer is
randomized to prevent students from memorizing the barcodes. In the “Answer Form” format, the questions
are not printed and students can only shade the answers (see Appendix B). In the “Questions without Barcodes” format,
all barcodes are removed.
4.3.1 Assessment Paper
with Barcodes
a. Select the Quiz Bank and choose the Quiz for
printing (Figure 4.1) by clicking on the Select column
beside
the Quiz
b. In the Quiz Menu at the top, select “Print …”.
The main print module is displayed (Figure 4.11).
c. Click on the “Questions with barcodes” button
d. Select the output Adobe PDF filename using the “Browse
…” button if necessary
e. Click on the “Print to PDF File” button
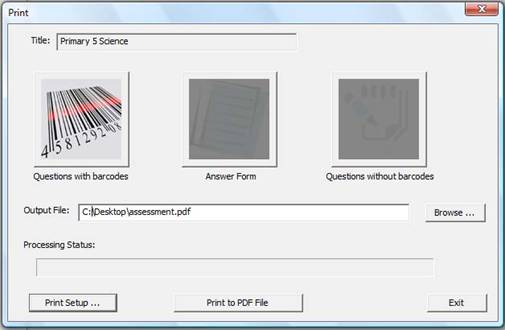
Figure 4.11: Print Assessment
Paper with Barcodes
4.3.2 Assessment Paper
in Answer Form Format
a. Select the Quiz Bank and choose the Quiz for
printing (Figure 4.1) by clicking on the Select column
beside
the Quiz
b. In the Quiz Menu at the top, select “Print …”.
The main print module is displayed (Figure 4.12).
c. Click on the “Answer Form” button
d. Select the output Adobe PDF filename using the
“Browse …” button if necessary
e. Click on the “Print to PDF File” button

Figure 4.12: Print Answer Form
4.3.3 Assessment Paper
without Barcodes
a. Select the Quiz Bank and choose the Quiz for
printing (Figure 4.1) by clicking on the Select column
beside
the Quiz
b. In the Quiz Menu at the top, select “Print …”.
The main print module is displayed (Figure 4.13).
c. Click on the “Questions without barcodes” button
d. Select the output Adobe PDF filename using the
“Browse …” button if necessary
e. Click on the “Print to PDF File” button
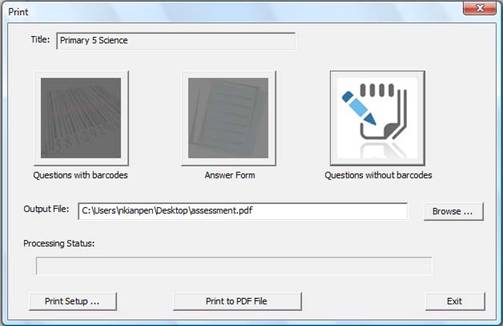
Figure 4.13: Print Assessment
Paper without Barcodes
4.3.4 Print Setup
a. Select the Quiz Bank and choose the Quiz for
printing (Figure 4.1) by clicking on the Select column
beside
the Quiz
b. In the Quiz Menu at the top, select “Print …”.
The main print module is displayed (Figure 4.11).
c. Click on the “Print Setup” button and Figure
4.14 is displayed
d. Set the Print Header either manually or by using
an image.
e. For manual setup of Print Header, select the
“Manual Config” radial button and click on “Details”.
Figure 4.15 shows the manual setup
parameters. User can edit the parameters and click on the
Select box to display the fields. Text alignment (Left, Centre or Right) can
also be selected. To save
the configurations as a default, click
on the “Set as Default” checkbox at the bottom
f. For setup of Print Header by image, select the
“Image” radial button and click on “Details”.
Figure
4.16 shows
the image setup dialog box. Users can paste an image from the clipboard or
import an
image file
using the “Paste Image From Clipboard” button.
g. Check the “Users to shade Identification
Numbers” box to allow students to shade their
registration number on the first page of
the assessment paper. Check on the
“Print on Every Page”
box to allow students to shade their
registration number on every page of the paper
h. Set the paper size (A4 or Letter)
i. To display text at the end of the paper, click
on the “Show Text” box (Figure 4.14).
Enter the text
to be
displayed at the end of the paper
j. Click on the “OK” button
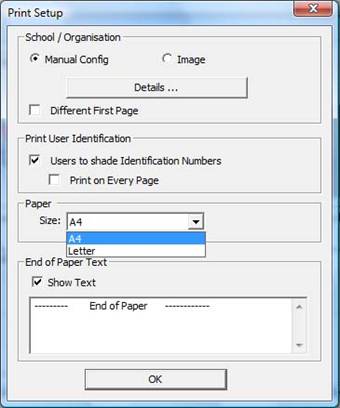
Figure 4.14: Print Setup Module
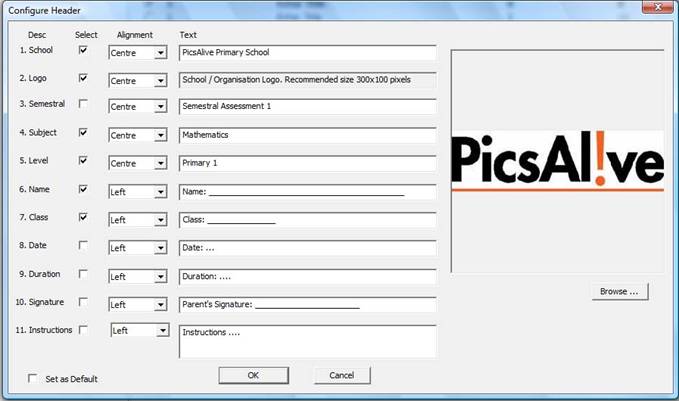
Figure 4.15: Manual Setup of Print
Header
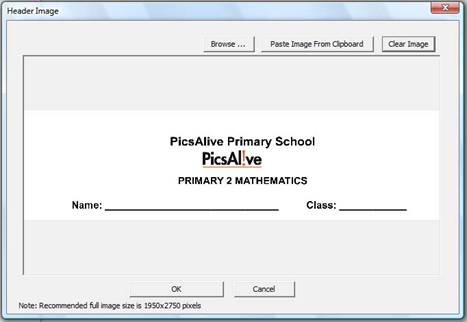
Figure 4.16: Load Print Header as
an Image