4. File Management and Other
Functions
PhotoViz and ImageViz provide many image
and file editing functions. Image
editing functions are image resize, rotate, undo and reset. File operations are file information, open,
save as, delete, print, exit and help.
4.1 Image
Rotate
This function is available in PhotoViz
and ImageViz. Images can be rotated in
Thumbnail or Image mode. Multiple images
can also be rotate in Thumbnail mode.
Three quick access icons are provided for rotation:
a. rotates image
90 degrees clockwise ![]()
b. rotates image
90 degrees anticlockwise ![]()
c. rotates image
180 degrees![]()
After selection, photographs are quickly
rotated by clicking on the above icons.
Photographs or images can also be
rotated using the Rotate Dialog Box.
Figure 4.1 shows the visual representation of the rotation results. As seen in Figure 4.1,
images can be rotated in three orientations: 90 degrees clockwise, 90 degrees
anti-clockwise and 180 degrees. If
multiple images are selected for rotation, only the last selected image will be
displayed even though rotation is applied to all the images.
Image can also be rotated in Image Viz.
The main differences between rotation in PhotoViz and ImageViz are:
a.
One image is rotated in ImageViz while multiple images can be rotated in
PhotoViz
b.
Images rotated in Image mode are not
automatically saved. The user
must
save the changes by clicking the Save As ![]() Icon.
Icon.
Rotate
Multiple Images
a.
In PhotoViz, select images to be rotated by depressing the control key and
clicking the images with the mouse.
b.
On the top menu, select Image->Rotate
c.
Select the desired rotation (see Figure 4.1)
d.
Uncheck the checkbox if you do not wish to overwrite the original file
e.
Click on the OK button
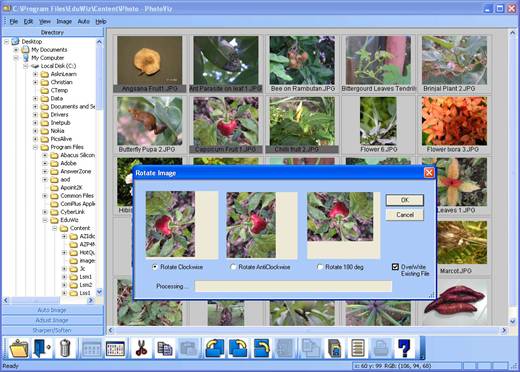
Figure 4.1: Rotate multiple images
in PhotoViz
4.2 Image
Resize
This function is available in PhotoViz
and ImageViz. PhotoViz is a handy tool
for resizing of multiple images for printing, emails, presentations or
publishing to the web. The user can also
resize a single image by clicking on the Resize Icon ![]() .
A dialog box shown in Figure 4.2 appears with the size of the currently
selected image. Click on the checkbox if
the proportion or the aspect ratio between the width and height of the image is
to be maintained. If the width or height
is changed, PhotoViz will automatically calculate the other parameter. In PhotoViz, the user can also choose to
overwrite the existing file. The
Overwrite Existing File checkbox is disabled in the ImageViz.
.
A dialog box shown in Figure 4.2 appears with the size of the currently
selected image. Click on the checkbox if
the proportion or the aspect ratio between the width and height of the image is
to be maintained. If the width or height
is changed, PhotoViz will automatically calculate the other parameter. In PhotoViz, the user can also choose to
overwrite the existing file. The
Overwrite Existing File checkbox is disabled in the ImageViz.
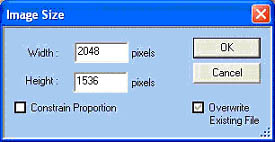
Figure
4.2: Resize
Dialog Box
4.3 Image Zoom
This function is only available in
ImageViz. ImageViz optimizes the viewing
size of the image to the display area.
This means that the image is automatically scaled to fit the display
area (in gray). Most modern digital
cameras have very high resolution and display image is usually scaled downwards
to fit the display.
For customized
viewing, users can use the Zoom In ![]() or Zoom Out
or Zoom Out ![]() icons to scale the images. The Zoom Out Icon will reduce the image
(Figure 4.3) while the Zoom In Icon (Figure 4.4) will enlarge the image in the
display. The size of the original image
is not changed.
icons to scale the images. The Zoom Out Icon will reduce the image
(Figure 4.3) while the Zoom In Icon (Figure 4.4) will enlarge the image in the
display. The size of the original image
is not changed.
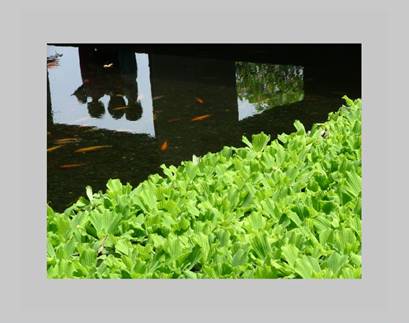
Figure 4.3: Viewing Image at 10% of original size (Zoom Out)
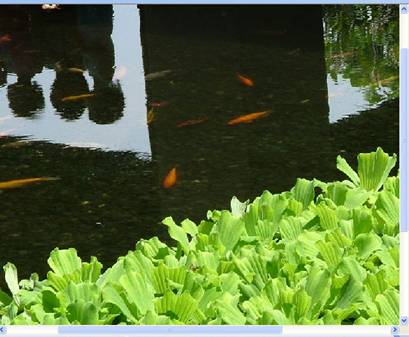
Figure
4.4:
Viewing Image at 22% of original size (Zoom In)
4.4 File
Information and File Rename
This function is available in PhotoViz
and ImageViz. When the File Properties
Icon is clicked, a dialog box shown in Figure 4.5 is displayed. In Figure 4.5, the first parameter is the
file name. The file name is editable and can be changed.
Two types of properties are displayed:
image properties and camera properties.
The image properties show the image name, image size (in pixels) and the
number of bits per pixel. The imaging
parameters are displayed in the camera properties. Note that these imaging parameters are only
available in JPEG file formats only.
Most camera manufacturers stored imaging parameters using the EXIF
standard. The EXIF information displayed
by PhotoViz is: Date/Time, Camera Made, Camera Model, F-Stop, Shutter Speed,
Focal Length, ISO Rating and Flash Used.
PhotoViz also preserves the EXIF information when a new file is created.
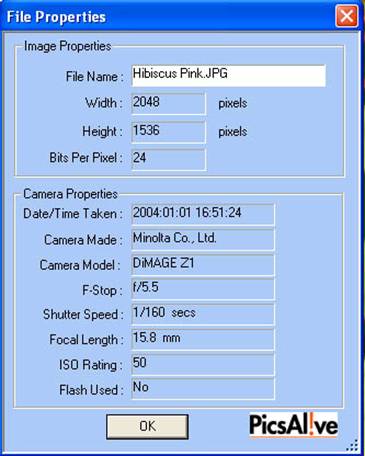
Figure
4.5:
File Properties Dialog Box
4.5 Image
Reset and Image Undo
This function is available in
ImageViz. The Reset function restores the image to its original
state. This function is useful when the
useful wants to discard all the tuning process and starts over again.
The Undo function on the other hand
restores the image to the state of the previous operation i.e. only the last
image operation is removed.
4.6 Print
This function is available in PhotoViz
and ImageViz.
Print
Image
a.
In PhotoViz, select image to be printed
b.
Click on the Print Icon ![]()
c.
Select Landscape or Portrait layout
d.
Click on the OK button
It is advisable to sharpen the image
before printing as printers tend to soften printouts due to limitations in
color reproduction.
4.7 Image
Open and Save As
This Image Open function is available in
PhotoViz and ImageViz. The Save As function
is only available in ImageViz. Images
can be opened by double clicking of the image in PhotoViz or by clicking the
Open Image Icon.
Image
Open
a.
Select image in PhotoViz
b.
Click on the Open Image Icon ![]() or by Double clicking the image
or by Double clicking the image
Image
Save As
a.
In ImageViz, click the Save As Icon ![]() and a dialog box appears
and a dialog box appears
b.
In the dialog box, select the directory to save image, key in the filename and select
the file format
c.
Click on the OK button
d.
For JPEG files, select the file quality and click on the OK button
4.8 Delete
This function is available in PhotoViz
and ImageViz. Single or multiple file
deletions are supported.
Image
Delete
a.
Select single image or multiple images in PhotoViz
b.
Click on the Delete Image Icon ![]() and a dialog box appears (see Figure
4.6)
and a dialog box appears (see Figure
4.6)
c.
Click on OK to confirm deletions
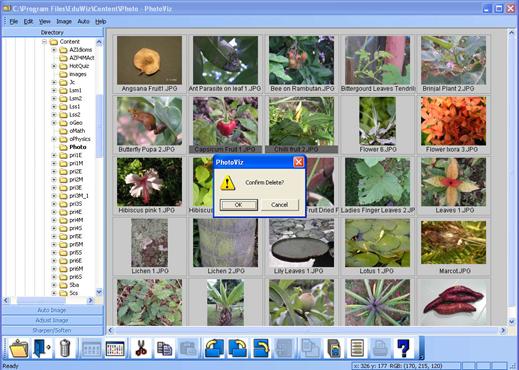
Figure
4.6:
File Deletion Dialog Box
4.9 Launching
Application
This function
is available in PhotoViz and ImageViz.
Microsoft Paint can be launched within PhotoViz to further edit the
image.
Launching
Microsoft Paint
a.
Select image to edit
b.
In the top menu, select Help->Launch Application to Edit
c.
If multiple images are selected in PhotoViz, only the last selected image will
be used
4.10 Exit
This function is available in PhotoViz
and ImageViz. The Exit Icon ![]() will quit the PhotoViz application.
Remember to save the image in Image mode before clicking on the Exit
Icon.
will quit the PhotoViz application.
Remember to save the image in Image mode before clicking on the Exit
Icon.